Adobe has been working on a new project that aimed to make the design workflow, specifically the transition from UI design to interactive prototypes, more efficient and rapid to adapt to the agile and innovative needs of our present; a project they made with designers in mind.
The project was announced in 2015 as Project Comet, and earlier this year in 14th of March 2016 Adobe released their first preview edition with an official title being: Adobe Experience Design (a.k.a Adobe XD CC).
As a designer myself, I have worked mainly with Adobe PS and AI for designing UI, and InVision App for prototyping purposes. However what Adobe XD offers is an all in one process; a seamless transition from designing, prototyping to recording and sharing all in one place without the need of any external tool, which is exactly about what digital designers need at the moment to avoid the hassle of organizing the assets of the design lifecycle in different places and platforms.
You can download and start using Adobe XD for free through your Creative Cloud account, even if you don't have a subscription you can still sign up and get started with it. This product is however only available for Mac OSX users; Microsoft Windows users will have to wait until the end of 2016 to get their hands on it according to Adobe. The commercial release is predicted to be on 2017, depending on the feedback they receive to help them improve their product.
In this article I will explain the digital design process end-to-end for Adobe XD, in addition to describing the features it gives, and the future plan to complete the product. Let's begin by going through a step-by-step process to unravel the features of Adobe Experience Design CC.

Once you open the program, the startup window pops up offering a range of preset standard canvas dimensions along with custom size option. Adobe XD is also providing handy UI kits for iOS, Android and Microsoft Windows.

You could also head over their Resources section for any inquiry. And make sure to visit their Tutorial page which will be updated for new tips and techniques with every new feature they add on to the demo product.
Next: After selecting your canvas you will see 2 distinctive tabs on your top left section: Design and Prototype.
In this area you can create your design, vector shapes or icons and make all the changes that you require. You'll notice that there are no screen/elements list on your right panel unlike the rest of the Adobe products - keep reading and you will know why -. However, it gives you a clear and focused space to design.

You can easily port screen/elements and artwork from Photoshop and illustrator onto your XD artboard as well (by copy-paste or importing files directly within the program).
When it comes to masking, you can do it in different ways:
So far, the feature that stands out the most is the Repeated Grid where you are able to duplicate your elements vertically or horizontally as list or grid in a very easy and intuitive way. Ungrouping the grid enables you to modify the row individually. Like so:


Now this is where creating the 'experience begins. In the Prototype mode you have the ability to animate your design preview record and eventually share it with team or clients.
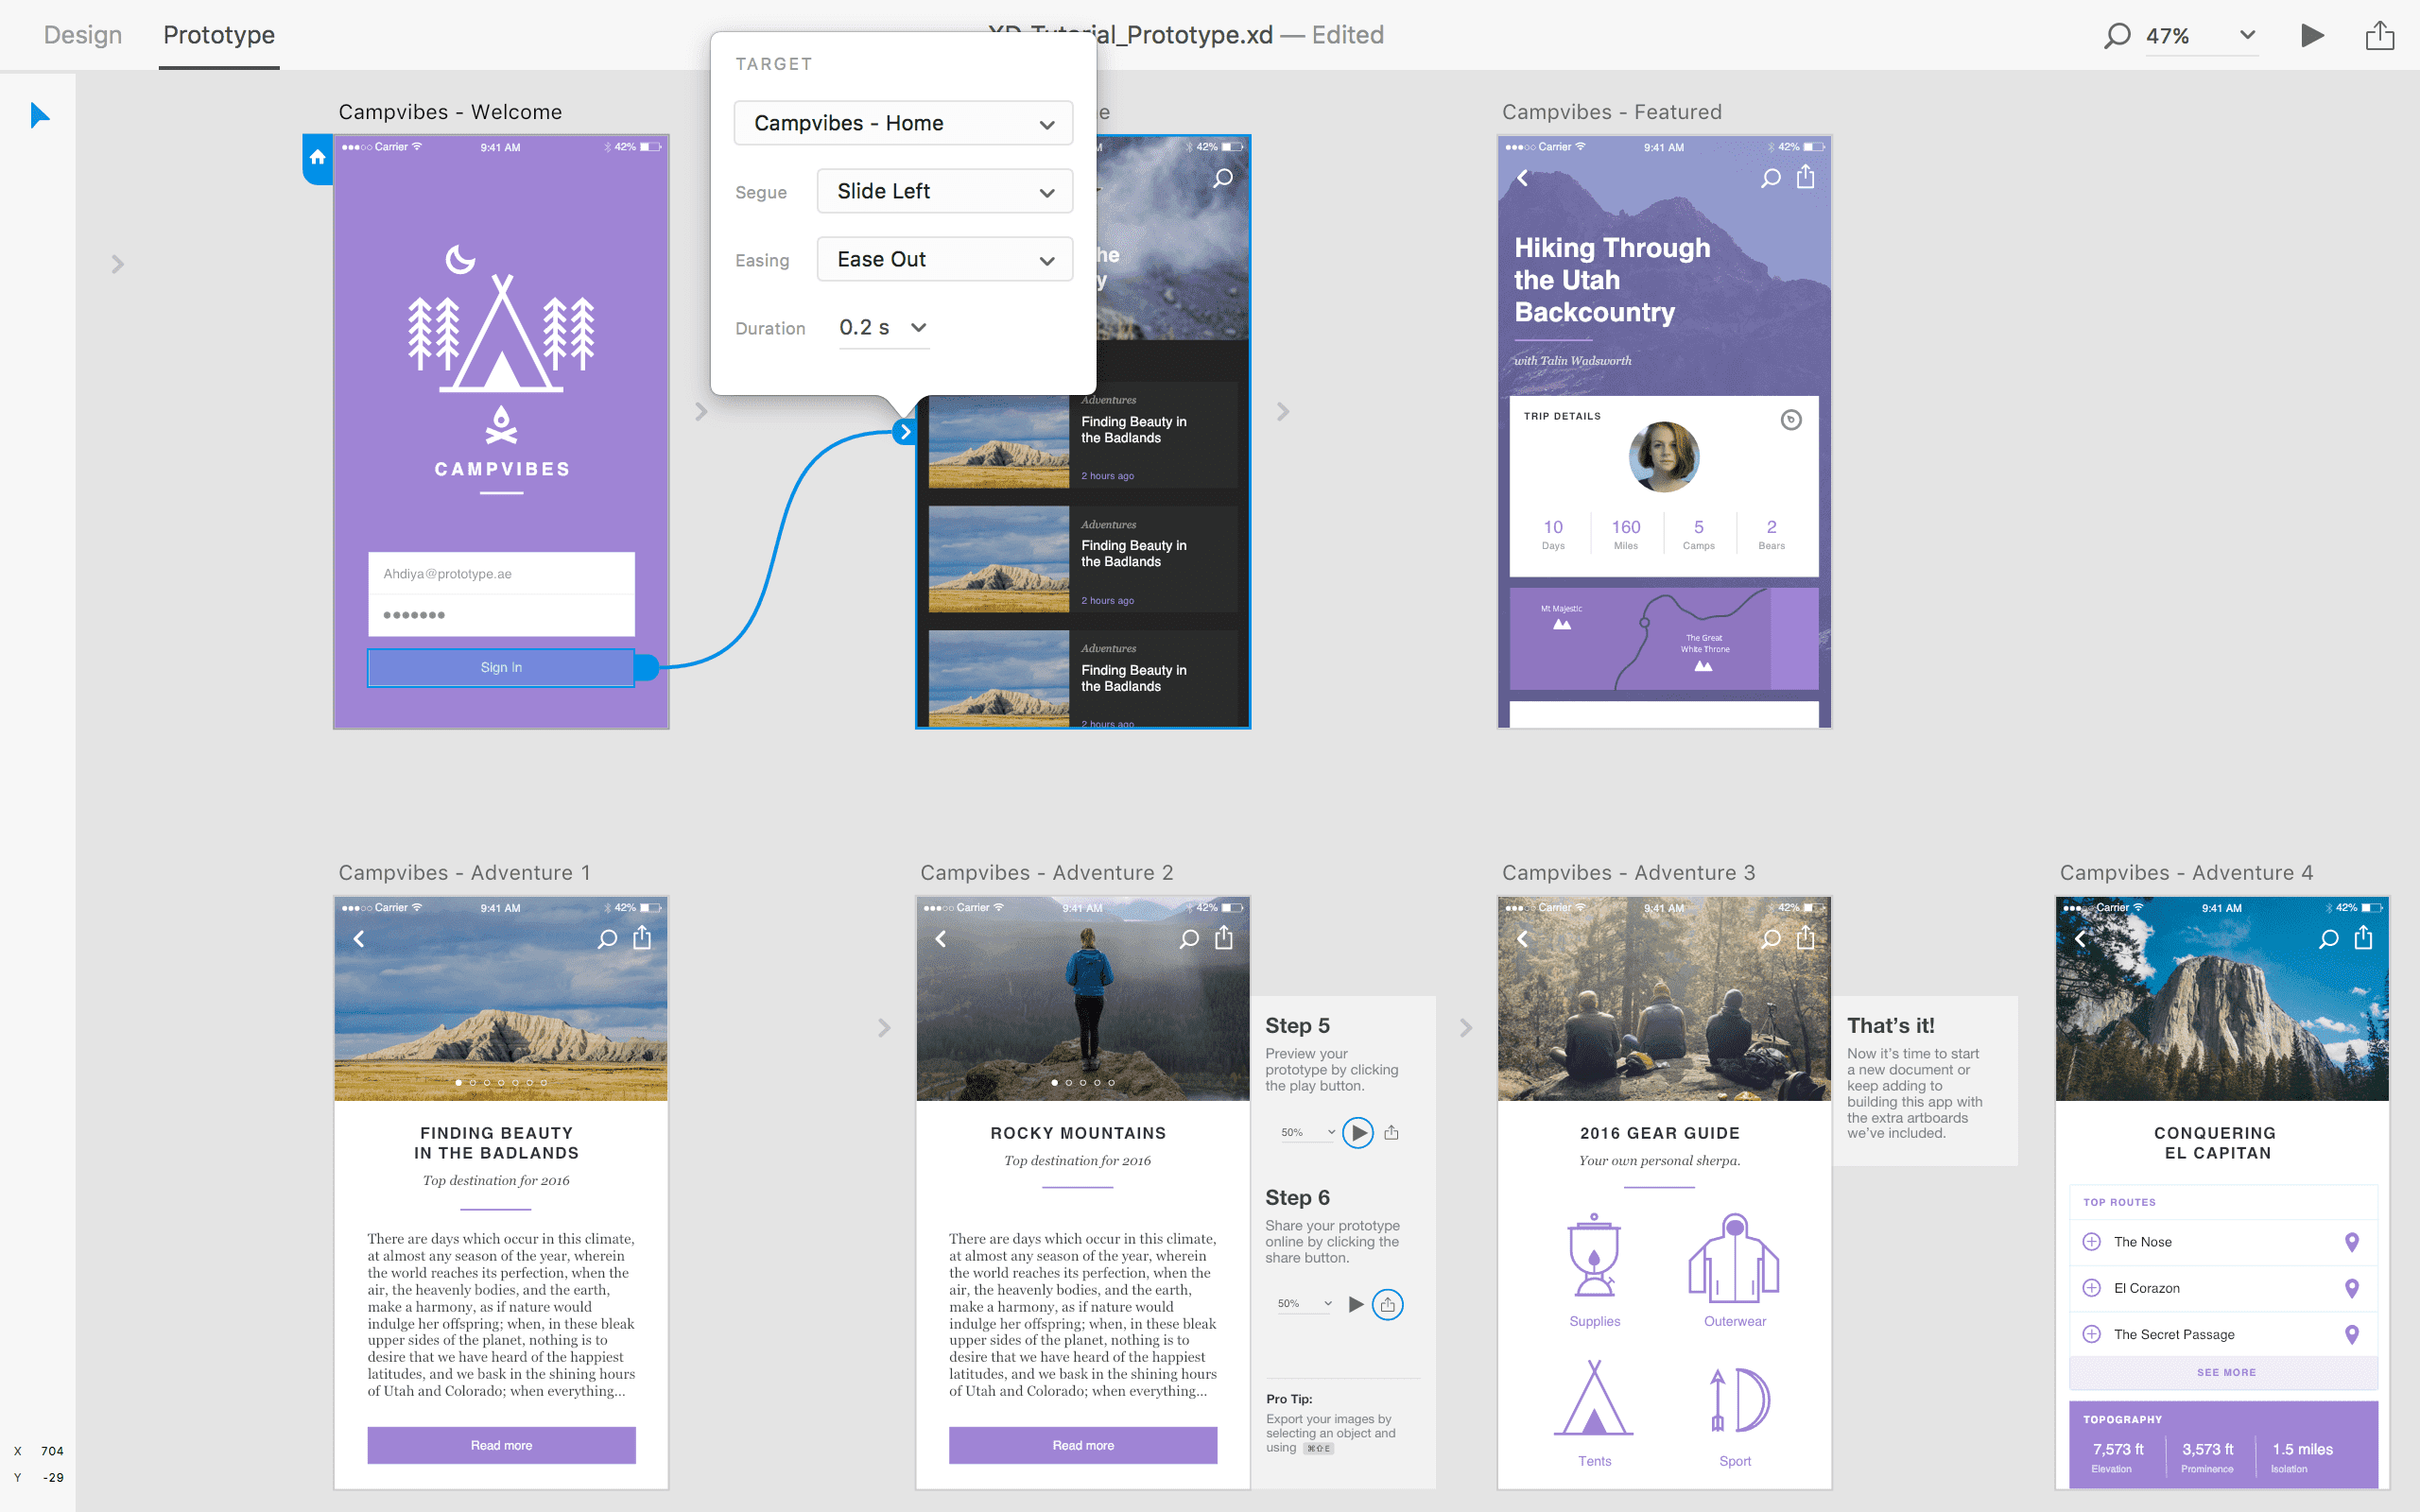
(Prototype mode)
On the Prototype mode all your design tools will disappear. Obviously this is where you need to work on designing interactivity by animating between UI screens to present the user flow in different scenarios. When you select a screen/element a tiny blue arrow appears that you can drag and link it to the screen of your choice. You will also be able to customize your transition sequence animation and duration along with it.

Once you're done with your prototyping and interaction design you need preview the results to perform usability testing persona testing feature feasibility testing etc. Adobe XD gives you have two options to export your work in portable and presentable (ultimately testable) forms:
Record your prototyping and send the demo to for testing.
The more appealing option and personally I think is an outstanding plus is exporting your work in HTML format to run on any web browser by loading it from your Creative Cloud storage. The huge advantage of this option is that it allows designers who know a little bit about HTML/CSS/JS to incorporate more complex animations in their prototypes to show-case the interaction exactly as it's imagined. You can also ask your colleague developers to help with the small effort to put those animations together. This will on one hand ensure right communication of your design vision to testers (or clients) and at the same time will give the developers an accurate brief of the animation effects timings ...etc

I would call it the new evolution in the UX space. Because it has a great potential; quite innovative very efficient and intuitive process to use although there are many things that are still missing most of the features need to be improved and new ones to be added. For instance some of the shortcuts that I use on Photoshop or illustrator are not applicable here and you can export your files only as PNG and SVG formats other formats are not included yet. It is only the 0.5 version release I am sure more features and techniques will be added as the time goes on.
Adobe has promised to keep updating and deliver new features that you can look forward to such as:
With all that being said it is worth to download and explore XD. So go ahead Download the Experience design go over their Tutorials and don't forget that you can share your ideas and give feedback if you wish to help your fellow designers ;)
Looking for an iOS app development company or an Android app development company? We're experts at both. Contact us for a free consultation.
'
Subscribe to our blog to receive relevant news and tips about digital transformation, app development, website development, UX, and UI design. Promise we won't spam you.
Prototype is a Digital Strategy & Transformation Agency founded in 2010 with the goal to help companies innovate and become digital industry leaders.
As a UX-focused digital agency, we create digital strategies & technology solutions from our offices in Dubai.
Dubai
DMC 1, 111
Media City, Dubai
dubai@prototype.net


© 2022 Prototype